| |
 |
|
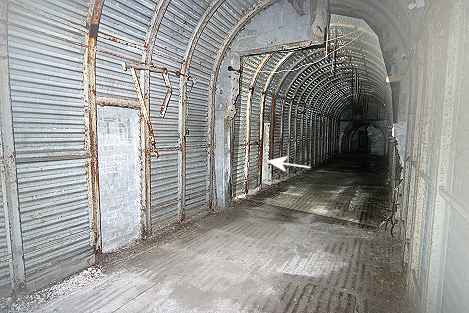
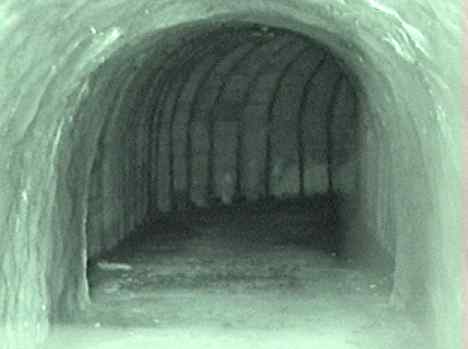
Internal
east portals of No2 tunnel. The concrete partition wall has been partly demolished but can still be made out in the
centre of the photo. The room behind the partition housed the diesels (105 on the plan) and the
blocked-up portal (arrowed) led the exhausts to the
outside. The
room in the foreground contained the environmental
coolers (106 on the plan)
and the blocked-up portal on the centre left
channelled the waste heat to the outside. Photo:
Jan West |
|
| |
| |
| |
 |
|
Update: 23/06/2013
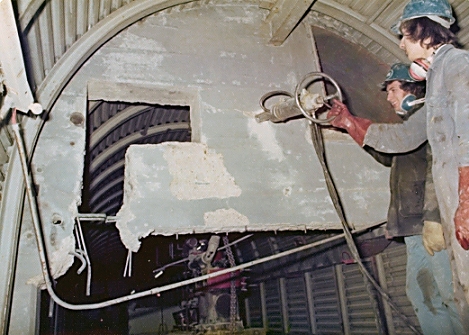
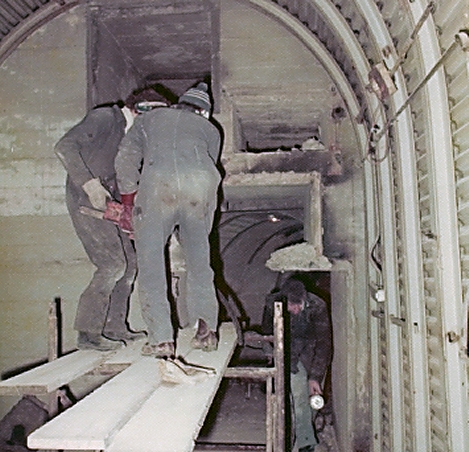
During 1977 the MoD decided to remove the diesel generator from the UGHQ.
To achieve this the concrete partition, described above, had to be
removed. Here we see Nigel Ostler-Harris (wearing red gloves) and Trevor Critchley using
a hydraulic burster.
Photo: Nigel Ostler-Harris |
|
| |
| |
|
|
 |
|
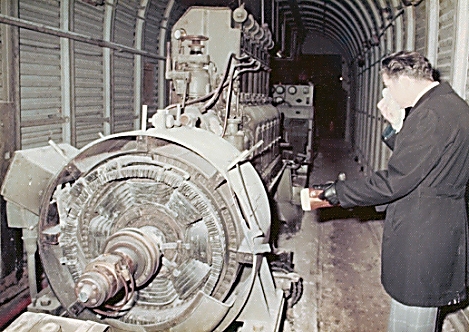
Update: 23/06/2013
The Diesel generator set being inspected by Peter Griffiths the then MP
for Portsmouth North. If you know anything about this type of engine
then please contact me.
Photo: Nigel Ostler-Harris
It's a 6 cylinder Ruston & Hornsby engine. - Stoker Smith - 26/07/2013 |
|
| |
| |
| |
|
|
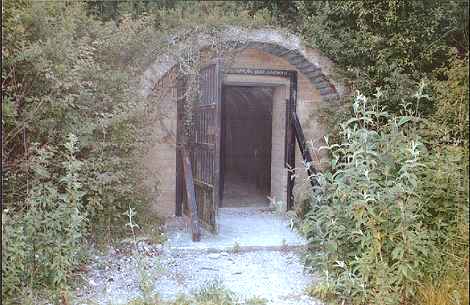
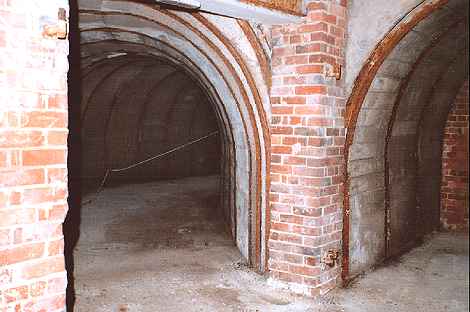
Tunnel
portal No3 (EE3 on the plan). The
area around it is now heavily overgrown. The gate and entrance have both been replaced during
the 1990s. The door frame is reinforced with 2 steel buttresses, and the gate
is covered with 1 inch steel mesh. The adit survives because of the continued need for
underground ventilation and emergency escape. This was used as an entrance to
the NATO communication centre which made use of the
underground complex during the Cold War. During the early morning the
confidential waste was brought out here and burnt. |
|
| |
| |
| |
|
|
View
through the gate of portal No 3 (EE3
on the plan). The lining closest to
the portal has been sprayed with shotcrete, further
back the steel colliery style ribbing is exposed. The adit turns sharply
to the right leading to a blast trap, and the first set of blast doors.
There
is a strong outflow of cold damp air all year round. |
|
| |
| |
| |
 |
|
Further
along the No3 tunnel is a fine example of a blast trap. The tunnel on the
left leads off to the underground complex whilst the one on the right
leads to a brick wall intended to reflect back any bomb blast. The hinges
on the wall indicate that heavy blast doors were once fitted. |
|
| |
| |
| |
 |
|
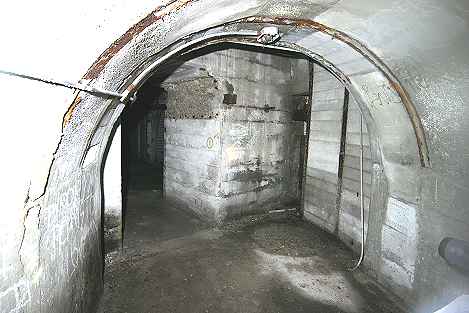
No3
tunnel showing a doorway on the centre left as it leads into UGHQ proper.
Its height has been increased postwar by removing the upper 1 foot of
reinforced concrete. The doorway is a 'pinch point' for a blast and gas
proof sliding door. This door was 6 inches thick and its racer track can
be seen on the floor.
Update: 25/04/2014
The circular patch on the floor shows where a large air intake fan was
situated. Ducting has been located under the floor which runs to the
outside of tunnel No 3. The photo below shows a large square hole in the
top of the other side of the blast wall where the air flowed in.
Source: Andy Stevens (UCAP) |
|
| |
| |
| |
 |
|
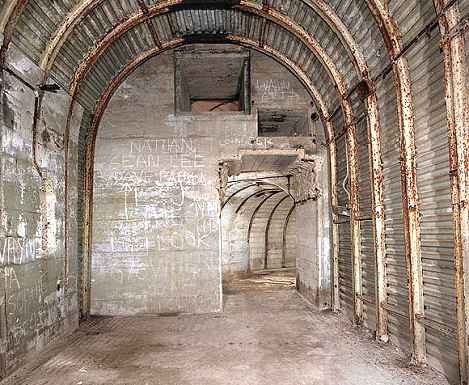
No3
tunnel again looking out from the UGHQ (106 on the plan)
- opposite to the previous photo. The doorway and the alterations to it
show up well.
During the mid 1990s the complex was broken into, hence the graffiti on
the wall.
Photo:
Nick Catford - Subterranea
Britannica |
|
| |
| |
| |
 |
|
Update: 23/06/2013
Nigel and Trevor at it again. This explains the reason for the heightening
of the doorway in the above photograph. It was to enable the generator to
be removed as described previously (above).
Photo: Nigel Ostler-Harris |
|
| |
| |
|
|
|
|
|

|