|
After passing the Staff Course at
Greenwich (being one of the first two W.R.N.S. [Women’s Royal Naval
Service] Officers to do so) I was appointed, in April 1944, to the
Staff of the Commander in Chief [C in C], Portsmouth, as Assistant
Staff Officer Operations [S.O.O.]. I was one of the additional
officers appointed for the forthcoming Operation “Overlord”; and my first
job was to get to know, and as far as possible learn the Operation Orders
with special reference to the part Portsmouth was to play – the main
orders for operation “Neptune” as well as the five large volumes of orders
for the five Task Forces. As I was one of the “bigoted” [see footnote]
people, I was responsible for one of the few copies of the orders for
Operation “Neptune”, and I well remember that the second amendment to
these orders took me eight hours continuous work, which gives some
indication of their voluminosity.
Much has been written about the invasion of the continent but
comparatively little mention has been made of the work of C in C
Portsmouth and his staff. The Commander in Chief [Admiral Sir Bertram
Home Ramsay KCB, KBE, MVO] was responsible for sailing the whole of
the British and half the American Task Force and the subsequent convoys,
and (as the assault took place in Portsmouth Command) the protection of
all shipping in the “Spout” – cross-channel route - , as well as the
maintenance of anti-U/boat patrols both in the channel and in the assault
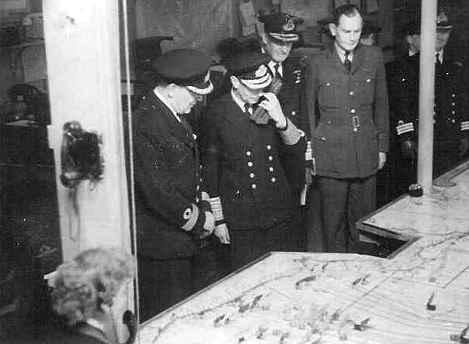
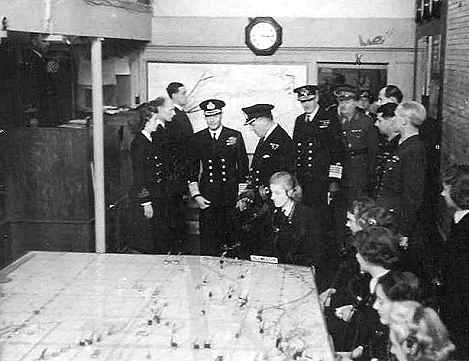
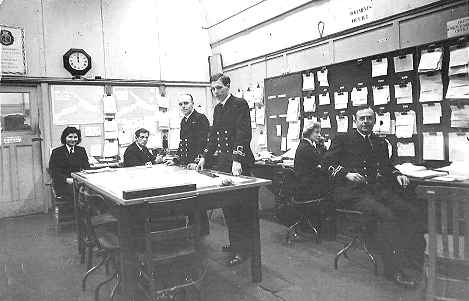
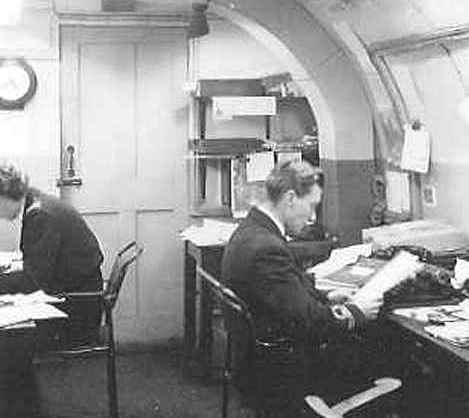
area. Into the Portsmouth Plotting Room came all the unfiltered
information from both sides of the channel as well as from ships; and from
this Plot many other authorities (including the H.Q. of A.N.C.X.F. [Allied
Naval Commander Expeditionary Force] at Southwick House) and later
Havre and Cherbourg were “fed”. Many battles were directed from the Plot,
signals being coded and transmitted by W.R.N.S. Signal Officers and W/T
operators [Wireless Telegraphy (i.e. Radio)] in a matter of
seconds.
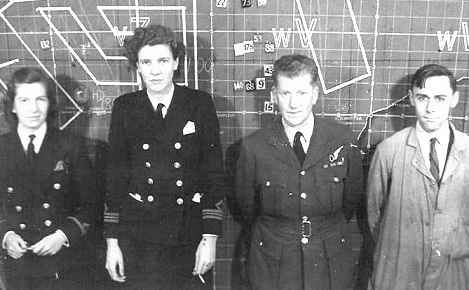
From D-Day – one onwards, the S.O.O another Officer and myself were, in
turn, keeping continuous watch on the balcony [referred to, by me, as
the ‘mezzanine gallery’ on other pages] in the Plotting Room. With us
on the balcony overlooking the plot was the Duty Captain, Chief of Staff,
Commander in Chief as well as any distinguished visitors. We had to keep
up to the minute information available for C. in C., or his
representative, arrange special operations, convoy escorts and very many
other things. We were assisted by one junior officer and one Wren.
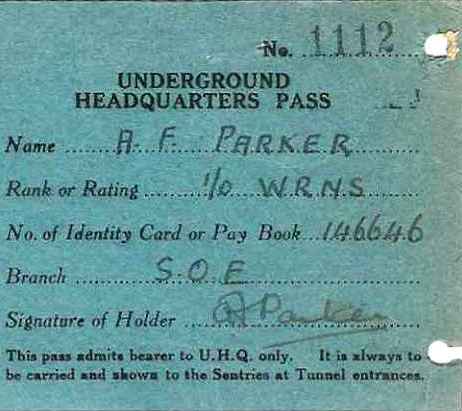
When the situation clarified and convoy sailings became more regular,
while still taking my turn as Duty S.O.O. at night I became Staff Officer
Escorts (S.O.E.). [as shown on Audrey’s security pass] My job was
to arrange escorts for all convoys in the command. It is difficult to give
figures covering a year when the situation was constantly changing, but on
average, there were 12 cross channel convoys a night with up to 6 escorts
each excluding the small ships of landing craft escorted by Costal forces.
Later on troop convoys began to make use of the channel forts [Solent
Palmerston forts?] and they had to be met and brought through the area
to their destination. There were about 8 of these convoys per week. In
addition there were “special escort” jobs to arrange: such as the
escorting of battleships, bombarding forces and minelayers etc., and quite
a number of V.I.Ps. to be transported. I was continually arranging
sailings and escorts from damaged ports of Cherbourg and Harve, where the
U.S. authorities were working under great difficulties. Although they were
U.S. ports, the responsibility for the shipping as soon as it left harbour
was that of C in C Portsmouth. I had also to keep in close contact with my
opposite numbers in the neighbouring commands – the S.O. [Staff Officer]
escorts at Plymouth was for sometime a Captain R.N.
With the renewal of the U-Boat activity in the autumn of 1944 my job was a
very full time an complicated one, eventually I was given an assistant – a
3rd Officer W.R.N.S. Altogether between 30 and 60 Escort vessels
(destroyers, frigates, sloops and corvettes) and about 40 trawlers
comprised the Portsmouth Escort Force, and I was entirely responsible for
organising and dovetailing their various duties.
In conjunction with the S.O. [Staff Officer] Anti-Submarine [A/S]
I helped to arrange the A/S patrols, using and spare escorts to back up
his hunting groups to the best advantage according to the shipping
movements and general situation. Towards the end of the war, I took over
his work and the operation of his Escort Groups.
About the same time, I also became Deputy S.O.O. [Staff Officer
Operations], looked out for the S.O.O. during his leaves, and took my
turn as Duty Commander.
On three occasions during my time as S.O Escorts I was sent by the C in C
to visit the U.S. authorities on the far-shore: to the H.Q. ship off the
U.S. Beaches, to Havre and Cherbourg, to discuss and arrange various
matters connected with the escort and turnround of convoys. I made the
crossings in a convoy escort, in a different type of ship and with a
different type of convoy each time so as to get a better picture of “the
other end” and an understanding of the difficulties.
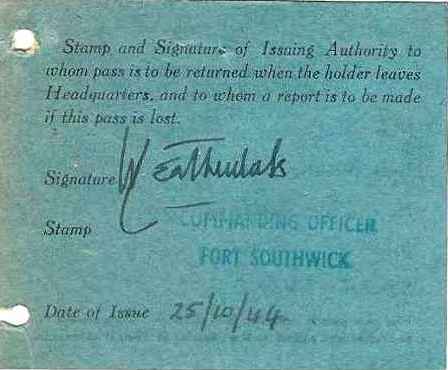
At the end of the U-Boat war (which was some weeks after V.E. [Victory
in Europe] Day all the escort forces – with the exception of 5 - were
paid off, and when this was completed, and the C in C’s staff returned
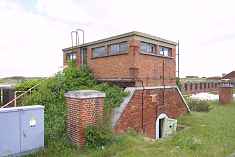
from the Combined H.Q. at Fort Southwick to their old home in the Dockyard
[HM Naval Base, Portsmouth] in September 1945, I left and was
demobilised.
Copyright: Richard Parker.
|